

In this article I will tell you the solution of ReadOnlyTimeStamps not getting preserved When Cloning Records in Apex.
So few days back I was working with cloning a record using Apex. While going through the official documentation I have found that we can also copy the read-only fields like CreatedById, CreatedDate, LastModifiedById, and LastModifiedDate by setting the preserveReadonlyTimestamps parameter to true.
Below is the piece of apex code which i tried executing from the anonymous window.
Case originalCase = [SELECT Id, CaseNumber, CreatedDate FROM Case LIMIT 1];

// Clone while preserving timestamps and auto-number
Case clonedCase = originalCase.clone(false, false, true, true);
insert clonedCase;
After executing the code I checked the createddate of the case record and to my surprise i found a new createddate which was unexpected.
It seems like you have faced the similar issue and you have not found anything on the internet but your search ends here.
Solution
We have to assign below permissions to the user.
- Set Audit Fields upon Record Creation
- Update Records with Inactive Owners
You might be thinking this is straight forward solution. You can try it yourself and if you got stuck you can continue reading.
These permissions are not immediately visible because they require activation at the organization level before they can be assigned to users. Here’s how you can enable and assign them:
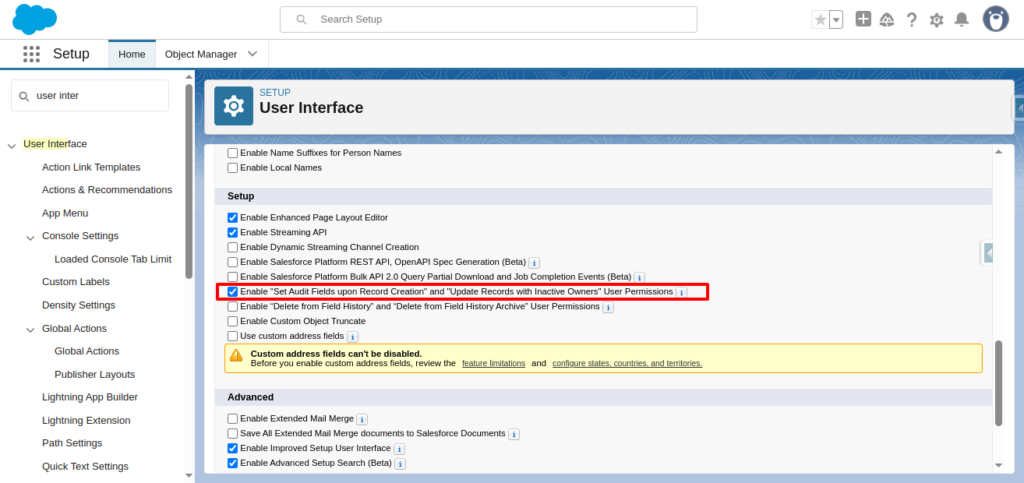
1. Enable the Permissions at the Organization Level:
- Navigate to Setup in Salesforce.
- In the Quick Find box, type User Interface and select it.
- On the User Interface settings page, locate and check the box labeled “Enable ‘Set Audit Fields upon Record Creation’ and ‘Update Records with Inactive Owners’ User Permissions”.
- Click Save to apply the changes.
Have a look at the screenshot below.
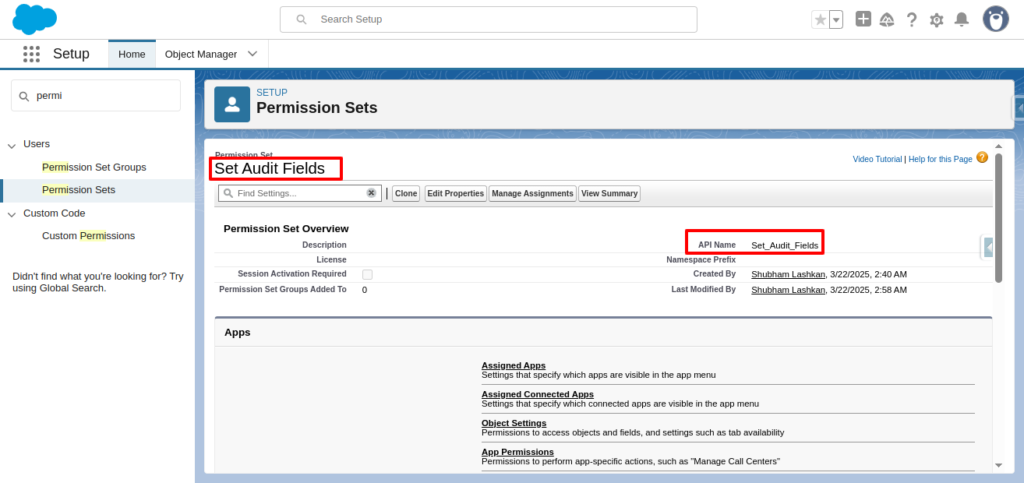
2. Create a Permission Set to Assign the Permissions:
- Go to Setup → Permission Sets.
- Click New to create a new permission set.
- Provide a Label (e.g., “Audit Field Permissions”) and API Name.
- Click Save.
Have a look at the screenshot below.
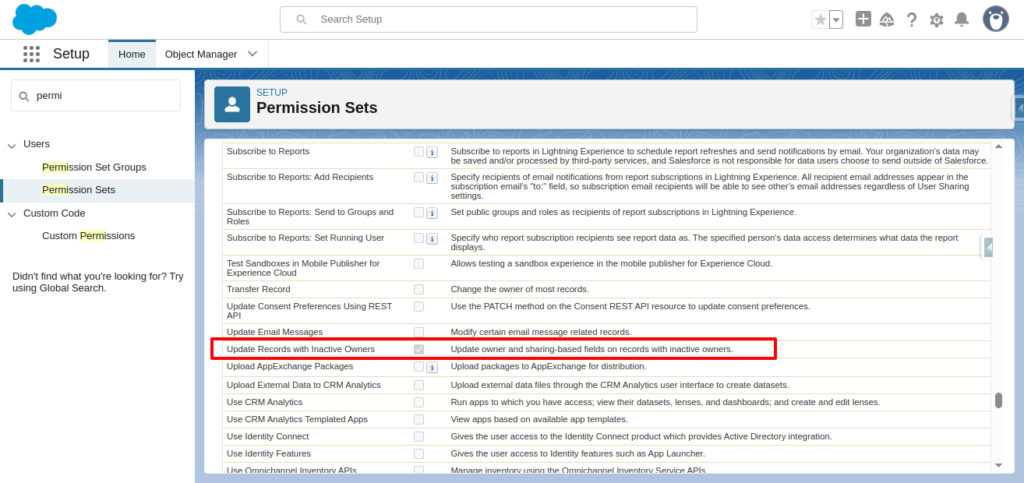
3. Add the Permissions to the Permission Set:
- In the newly created permission set, click on System Permissions.
- Click Edit.
- Scroll through the list and check the boxes for “Set Audit Fields upon Record Creation” and “Update Records with Inactive Owners”.
- Click Save to apply the changes.
Have a look at the screenshots below for better understanding.

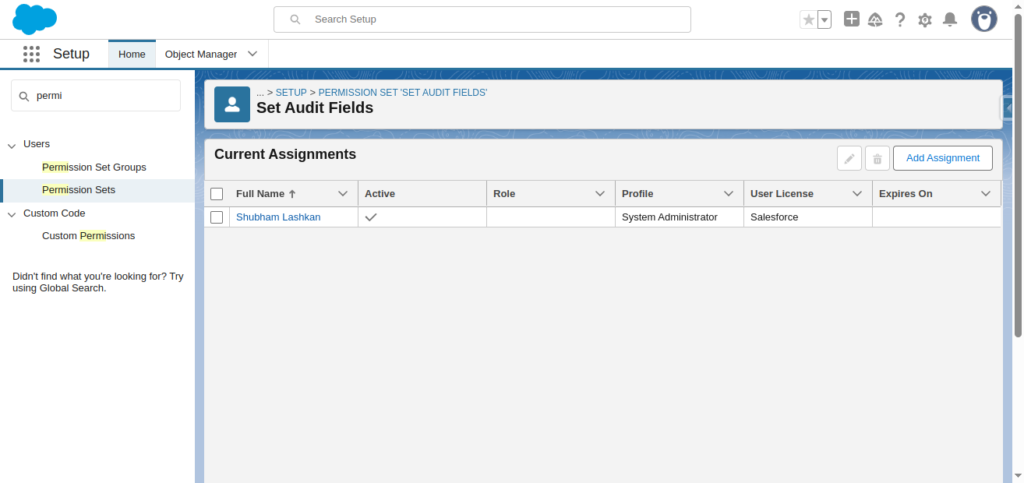
4. Assign the Permission Set to Users:
- In the permission set, click on Manage Assignments.
- Click Add Assignments.
- Select the users who require these permissions.
- Click Assign and then Done.
You can see below I have assigned the permission set to my user which is system admin.
Note: Standard profiles, including the System Administrator profile, cannot be edited to include these permissions directly. Therefore, using a permission set is the recommended approach.
By following these steps, you should be able to enable and assign the necessary permissions to set audit fields upon record creation in Salesforce.
Now If you execute the same code you will see the createddate or any system generated fields are getting copied to the new record.
We hope now you know How to fix ReadOnlyTimeStamps Not Preserved When Cloning Records in Apex?
Do checkout how to implement lazy loading in Salesforce?
Want to get started with LWC then checkout this short course.