
Once upon a time, there was a Salesforce Developer who made a critical error during a data migration—and paid the ultimate price for it. He was tasked with importing 10,000 potential customer records into a Salesforce Production org. But what seemed like a straightforward task turned into a disaster that got him fired.
Curious about what went wrong? Here’s the story: While importing the data, an Apex trigger fired, automatically sending emails with attachments to all 10,000 new records. These emails weren’t meant to go out—not to potential leads, not at that time, and certainly not in that format.
The mistake spiraled quickly. The issue escalated to management, and the developer was held responsible. Why did this happen? Because he forgot one crucial step: adding logic to control Apex triggers during the data migration process. Without it, every record processed by the data load triggered unnecessary automation, leading to the email fiasco.
If you don’t want to risk your career over a similar mistake, pay attention. This guide will teach you how to control Apex triggers during data migration using Custom Settings in Salesforce. Don’t leave your data—or your job—up to chance.
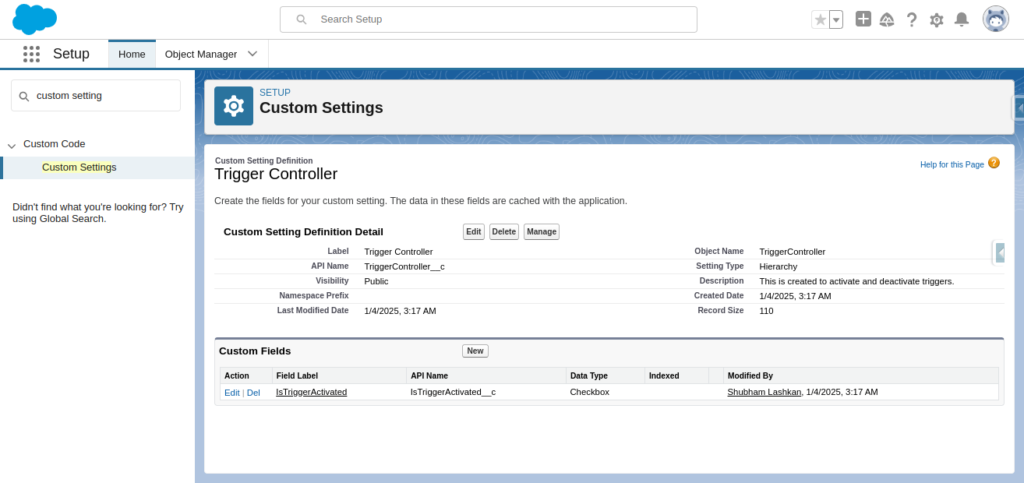
Create Custom Settings
As a Salesforce developer creating custom setting is not a rocket science. But here are the steps to create custom settings.
- Go to Setup
- Enter Custom Settings in the Quick Find box.
- Click on Custom Settings.
- Click New to create a Custom Setting.
- Enter a meaningful name like TriggerController.
- Select the type as hierarchy and save.
Create Custom field to control Trigger
Create a checkbox field in the custom setting you created above. Below are the steps to create a custom field.
- Select the custom setting which you created.
- Click New in custom fields section.
- Create a checkbox field to control the trigger with a meaningful name like IsTriggerActivated__c
- Save the field.
Here is how the custom setting will look like.
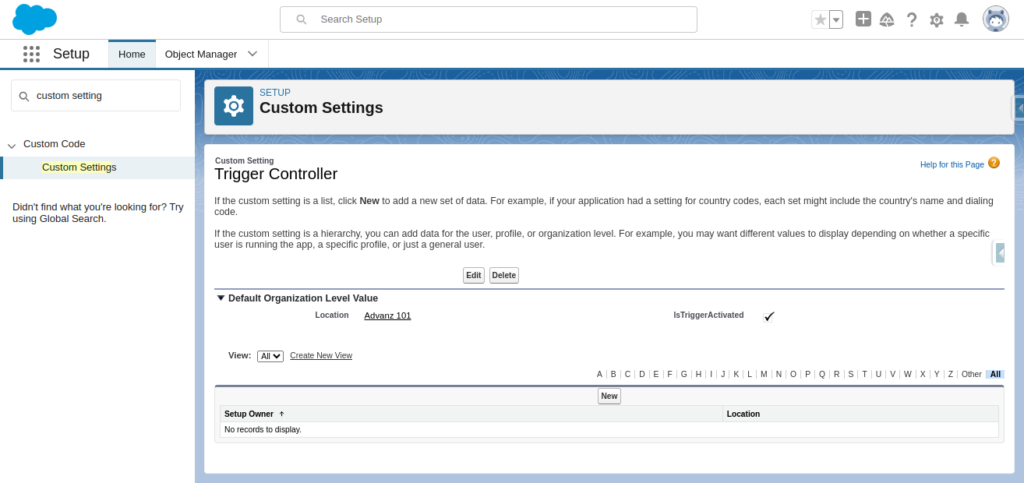
Create Custom Setting Record
Creating a custom setting record is straightforward. So I will just add a screenshot for reference below.
Code Time
During the start of this article we discussed about a scenario of lead record. So now let’s have a look at the code which will first check the custom setting record before calling the handler to send email.
trigger LeadTrigger on Lead (after insert) {
    // Get the custom setting
    TriggerController__c triggerController = TriggerController__c.getOrgDefaults();

    // Check if the trigger is enabled
    if (triggerController != null && triggerController.IsTriggerActivated__c) {
        // Call the handler method to send bulk email
        LeadTriggerHandler.sendBulkEmail(Trigger.new);
    }
}
Here, we are first retrieving the custom setting record (TriggerController__c) using getOrgDefaults() and then checking the value of the field IsTriggerActivated__c. If it is true, we call the LeadTriggerHandler class, specifically the sendBulkEmail method, which handles sending emails to the newly inserted Leads. This ensures that the trigger logic only runs when explicitly enabled.
So now, whenever you are about to load data into the production org, check if the logic written in the trigger handler needs to be processed. If yes, ensure that IsTriggerActivated__c is set to true; otherwise, set it to false before performing the data load.
Conclusion
Let’s get back to the story of the Salesforce developer who lost his job due to a trigger mishap. This unfortunate incident serves as a powerful reminder of how critical it is to manage trigger logic carefully, especially during data migrations. By implementing controls like custom setting, you can ensure that triggers only run when absolutely necessary. This prevents unintended consequences, such as sending emails to the wrong recipients, and safeguards against costly errors. So, take a moment to set up proper trigger controls in your own processes—because as the developer learned the hard way, a small oversight can lead to big problems.